4 min to read
unattended installation of windows 10/11 in packer
最近因为科研需要,想要用 kafl-based fuzzer - msFuzz 来 fuzz Win11 的内核,但是 msFuzz 本身只支持 Windows 10 的一个特定版本(为什么会这样呢?因为它是直接用了 kAFL 的 example… 然后这一步就妹有改)
然后部署中遇到的一个问题就是如何用 qemu 跑起来一个 win11 的 image,并且有以下操作:
- disable secure boot & tpm 这些可能影响 fuzz 的操作
- ansible 进行一些操作,比如 disable defender, register services for our fuzzing harness and agent
- 打包成一个 .box 的形式(虽然后续没有被用到 doge)
kafl 用的是 packer 来打包 image 的,而查了一下,packer 本身并没有很好的关于 Win11 的轮子,所以和男朋友进行了一波尝试,最后成功完成上述操作
win10 unattended installation
这个具体可见 msFuzz 的操作
具体来说,是用 qemu 来用 csm boot mode 起一个 Win10 的 image,然后在安装过程中,使用 unattended installation 的方式来进行自动化安装
win11 unattended installation
windows 11 相对于 win10 的安装有一定挑战,具体如下:
- windows 11 不支持 csm boot,见 reddit
- 当在 packer qemuargs 指定
-drive的时候,vagrant 不会自动把在 output_directory 创建的来放初始化好了的 Windows image 的 drive 挂载进 qemu,且在用 packer build 之前,该 directory 不可以被创建,所以我们需要先手动创建其他的 directory,挂载进 qemu 来作为 windows 安装 image 的 drive,然后把该 directory 的 qcow2 drive 压缩成 .box 形式
但是 packer 本身是直接将这个 output_directory 里面的 qcow2 drive 来压缩成 box 形式的,该问题需要想办法解决 - bypass secure boot and tpm checks
在期末周的时候配环境
在开始这些步骤之前,windows.pkr.hcl 如下
enable uefi boot
一开始我只改了 packer win10.pkrvars.hcl 里面的 iso_url 和 checksum 为 windows 11 的版本,但是运行 make build 的时候,挂 vnc 上去看一直没有 boot,当时还没太想到是什么问题,后来发现是因为 windows 11 不支持 csm boot,所以需要使用 uefi boot 的方式来安装 windows 11
具体方法参考 undus’s blog,arch linux guide
OVMF
OVMF 是一个开源的 UEFI 固件实现,为 QEMU 虚拟机提供了现代化的 UEFI BIOS 功能,替代传统的 SeaBIOS
我们参考 arch linux guide 的以下说法
Another and more preferable way is to split OVMF into two files. The first one will be read-only and store the firmware executable, and the second one will be used as a writable variable store. The advantage is that you can use the firmware file directly without copying, so it will be updated automatically by pacman.
Use /usr/share/edk2/x64/OVMF_CODE.4m.fd as a first read-only pflash drive. Copy /usr/share/edk2/x64/OVMF_VARS.4m.fd, make it writable and use as a second writable pflash drive:
-drive if=pflash,format=raw,readonly=on,file=/usr/share/edk2/x64/OVMF_CODE.4m.fd
-drive if=pflash,format=raw,file=/copy/of/OVMF_VARS.4m.fd
我们把 /usr/share/OVMF/OVMF_CODE_4M.fd code.img /usr/share/OVMF/OVMF_VARS_4M.fd efivars.img 拷贝到当前目录下,然后使得 efivars.img 可写,然后把上面 -drive 的内容添加到 packer 的 windows.pkr.hcl 中的 qemuargs 里面就行了
指定 cpu
发现改完之后,还是起不起来,大概现象是会循环启动吧,然后感觉可能是因为 qemu 的默认 cpu 太古老了,像是 这里 也遇到了同样的问题
然后还是参考 undus’s blog,添加了 "-cpu", "host" 的参数到 packer 的 windows.pkr.hcl 中的 qemuargs 里面,之后就可以正常 boot 了
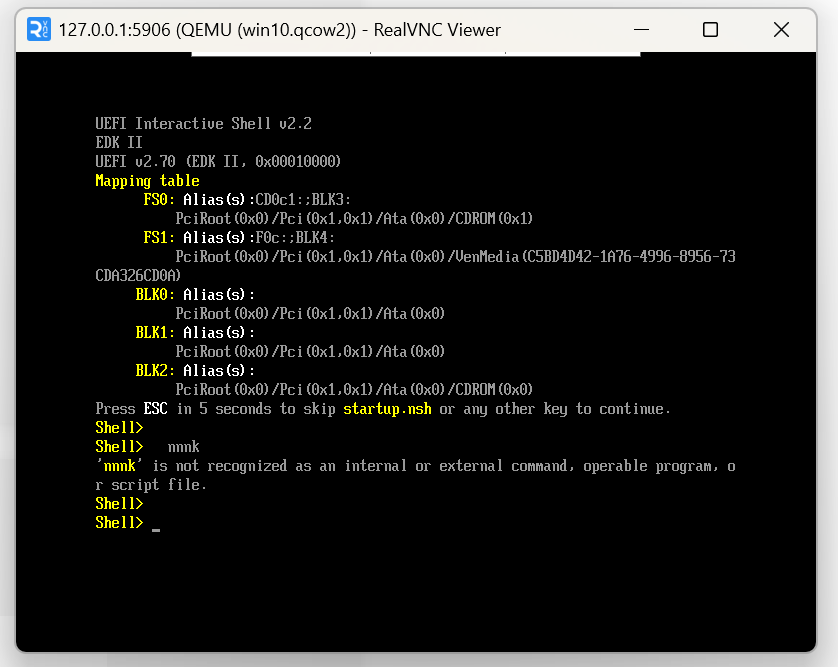
手动操作
vnc 连接到 qemu,发现要 “按任意键从 CD 启动”,然后一直按 esc 键,进入到 UEFI 的 boot menu,选择 “boot from uefi” 菜单的第一个,然后就可以进入到 windows 安装界面了
唉 要手动按键启动真是难评啊,”amazing how difficult microsoft made this huh”

installation
disabling secure boot and tpm
windows 11 在安装的时候会检查 secure boot 和 tpm 的状态,如果没有开启的话,会提示无法安装,所以需要在安装时用 autounattend.xml 先 disable secure boot 和 tpm 的 check
找到了下面这个 unattended install 的 生成器 里面有一个 feature 是 Bypass Windows 11 requirements check (TPM, Secure Boot, etc.)
我们用它生成一份,然后 cherry-pick 里面 bypass 相关的内容到我们的 autounattend.xml 里面就行了
具体来说,是添加以下几行
<RunSynchronous>
    <RunSynchronousCommand wcm:action="add">
        <Order>1</Order>
        <Path>reg.exe add "HKLM\SYSTEM\Setup\LabConfig" /v BypassTPMCheck /t REG_DWORD /d 1 /f</Path>
    </RunSynchronousCommand>
    <RunSynchronousCommand wcm:action="add">
        <Order>2</Order>
        <Path>reg.exe add "HKLM\SYSTEM\Setup\LabConfig" /v BypassSecureBootCheck /t REG_DWORD /d 1 /f</Path>
    </RunSynchronousCommand>
    <RunSynchronousCommand wcm:action="add">
        <Order>3</Order>
        <Path>reg.exe add "HKLM\SYSTEM\Setup\LabConfig" /v BypassRAMCheck /t REG_DWORD /d 1 /f</Path>
    </RunSynchronousCommand>
</RunSynchronous>
mount drive
之前在 win10 部署的时候,因为我们 qemuargs 里面没有 -drive 参数,所以 packer 会在 output-windows 目录下创建一个 qcow2 的 drive,挂载到 qemu 上,然后在安装过程中,windows 会自动将这个 drive 挂载到系统上
但是在 win11 安装的时候,当 -drive 在 packer 的 windows.pkr.hcl 中指定了 qcow2 的 drive 的时候,packer 不会自动将 output-windows 这个 drive 挂载到 qemu 上,所以需要手动挂载一个 drive
我们先留着后面解决打包 output-windows 里面的 image 为 box 的问题,先让 windows 能安装再说
我们新建一个 output-windows_1 的目录,在里面用 qemu-img create -f qcow2 win10.qcow2 164G 创建一个 qcow2 的 drive,然后在 packer 的 windows.pkr.hcl 中的 qemuargs 里面把他挂进去
["-drive", "file=/home/mimi/tmp2/kAFL/kafl/examples/templates/windows/output-windows_1/${var.vm_name}.qcow2,if=ide,cache=writeback,discard=ignore,format=qcow2"]
但是 windows 会检测到这个分区,然后报错 “Error selecting partition for install”
解决方法参考 这里
嗯,就是进 vnc 选中那个 disk,点 delete partition,然后 create partition,选择空间最大的那个 partition 点 next 就行
pack to box
完成上述步骤后,windows 就可以正常安装了,但是打包成 box 的时候会将 output-windows 里面的 qcow2 drive 压缩成 box 的形式,且难以修改压缩成 box 的文件夹名字,而真正需要打包的 qcow2 drive 在 output-windows_1
因为打包是在 “post processor” 阶段进行如下
post-processor "vagrant" {
    vagrantfile_template = "Vagrantfile_template"
  }
所以我们在这之前,增加一步 post process 把 output-windows_1 里面的 qcow2 drive 拷贝到 output-windows 里面
  post-processor "shell-local" {
    inline = [
      "rm -rf /home/mimi/tmp2/kAFL/kafl/examples/templates/windows/output-windows",
      "mkdir /home/mimi/tmp2/kAFL/kafl/examples/templates/windows/output-windows",
      "cp /home/mimi/tmp2/kAFL/kafl/examples/templates/windows/output-windows_1/win10.qcow2 /home/mimi/tmp2/kAFL/kafl/examples/templates/windows/output-windows",
      "echo copy completed",
    ]
  }
然后就可以正常打包成 box 了
debugging
主要是进行 PACKER_LOG=1 make build 看 packer 的 log,像是 qemu 的启动参数之类的看哪里不对,然后手动起 qemu 连接 vnc 调试
conclusion
感觉自己还是配环境配少了,很难将一些现象和原因联系起来,像是 win11 不支持 csm boot, -cpu host,需要手动启动 boot from cdrom 这些都是对象先发现的然后教我的,所以还是要实践中学习如何配环境的时候 trouble shooting
links
相关的配置传到 github 上了
- https://github.com/Rosayxy/packer-win11-hcl
- https://github.com/Rosayxy/msFuzz
- https://github.com/Rosayxy/kafl.targets.win11
Comments